What Do You Do After Aerating And Overseeding

I think it’s safe to say most people in Knoxville, TN know that fall is for aerating, overseeding, and feeding. But not everyone knows what to do after that. I hope to clear that up today: What DO you do after aerating and overseeding?

1. MONITOR GERMINATION

This is an example of too much seed.

Clearly this is too much seed. This will keep the fescue plants from reaching maturity. The result is a weak, poorly performing turfgrass.

This is the proper rate of seed

This is the proper rate of seed. This allows ample room for plants to mature and “harden.”

Germination is the name of the game. How do you get germination? Seed to soil contact. A two pass aeration will allow plenty of seed to soil contact for seed germination. Do you have areas that aren’t germinating well? Use a hand cultivator to scuff up the area and apply a little more seed.

2. FEED APPROPRIATELY

I don’t think it’s any secret that I’m a fan of organic fertilizers. When it comes to caring for new seed, I am the biggest fan of organic fertilizers. Organic fertilizers pose almost zero risk (assuming there is no spillage) to new seed. They last longer and provide even greater benefits in building quality soil.

Not only do I fertilize at the time of overseeding, four weeks later, I feed a second time. Any extra tillering we can get to take place before the winter sets in the better off we’ll be once summer rolls around.

3. WATER WOES

Watering is definitely the mostsprinkler_via_hose 
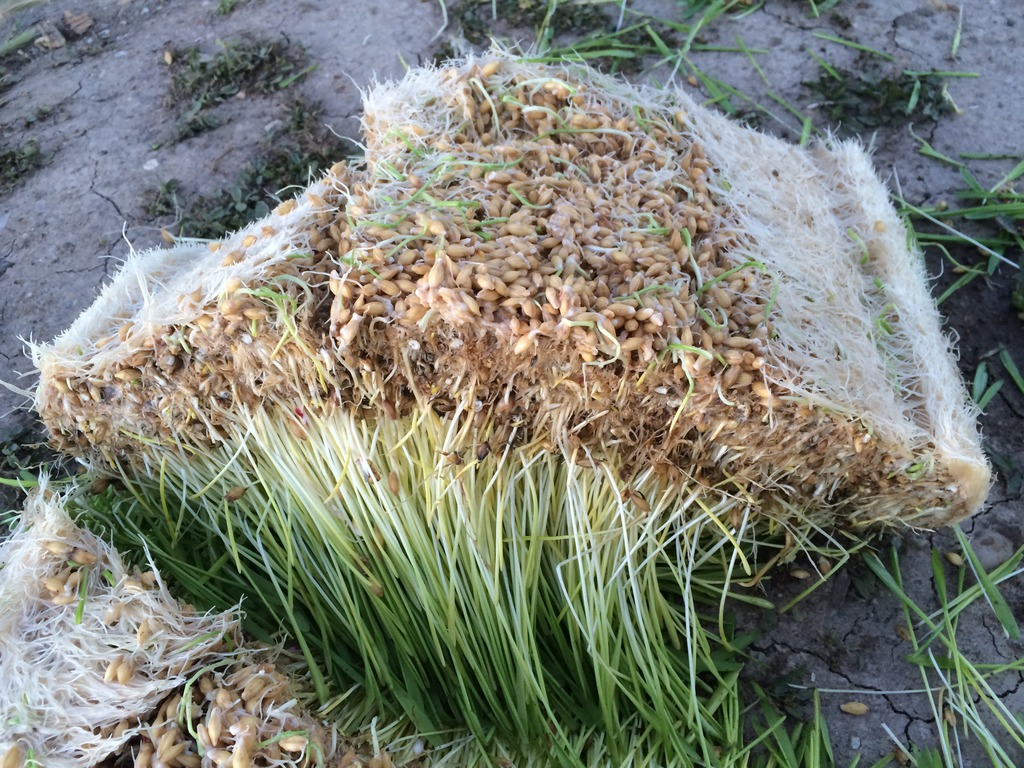
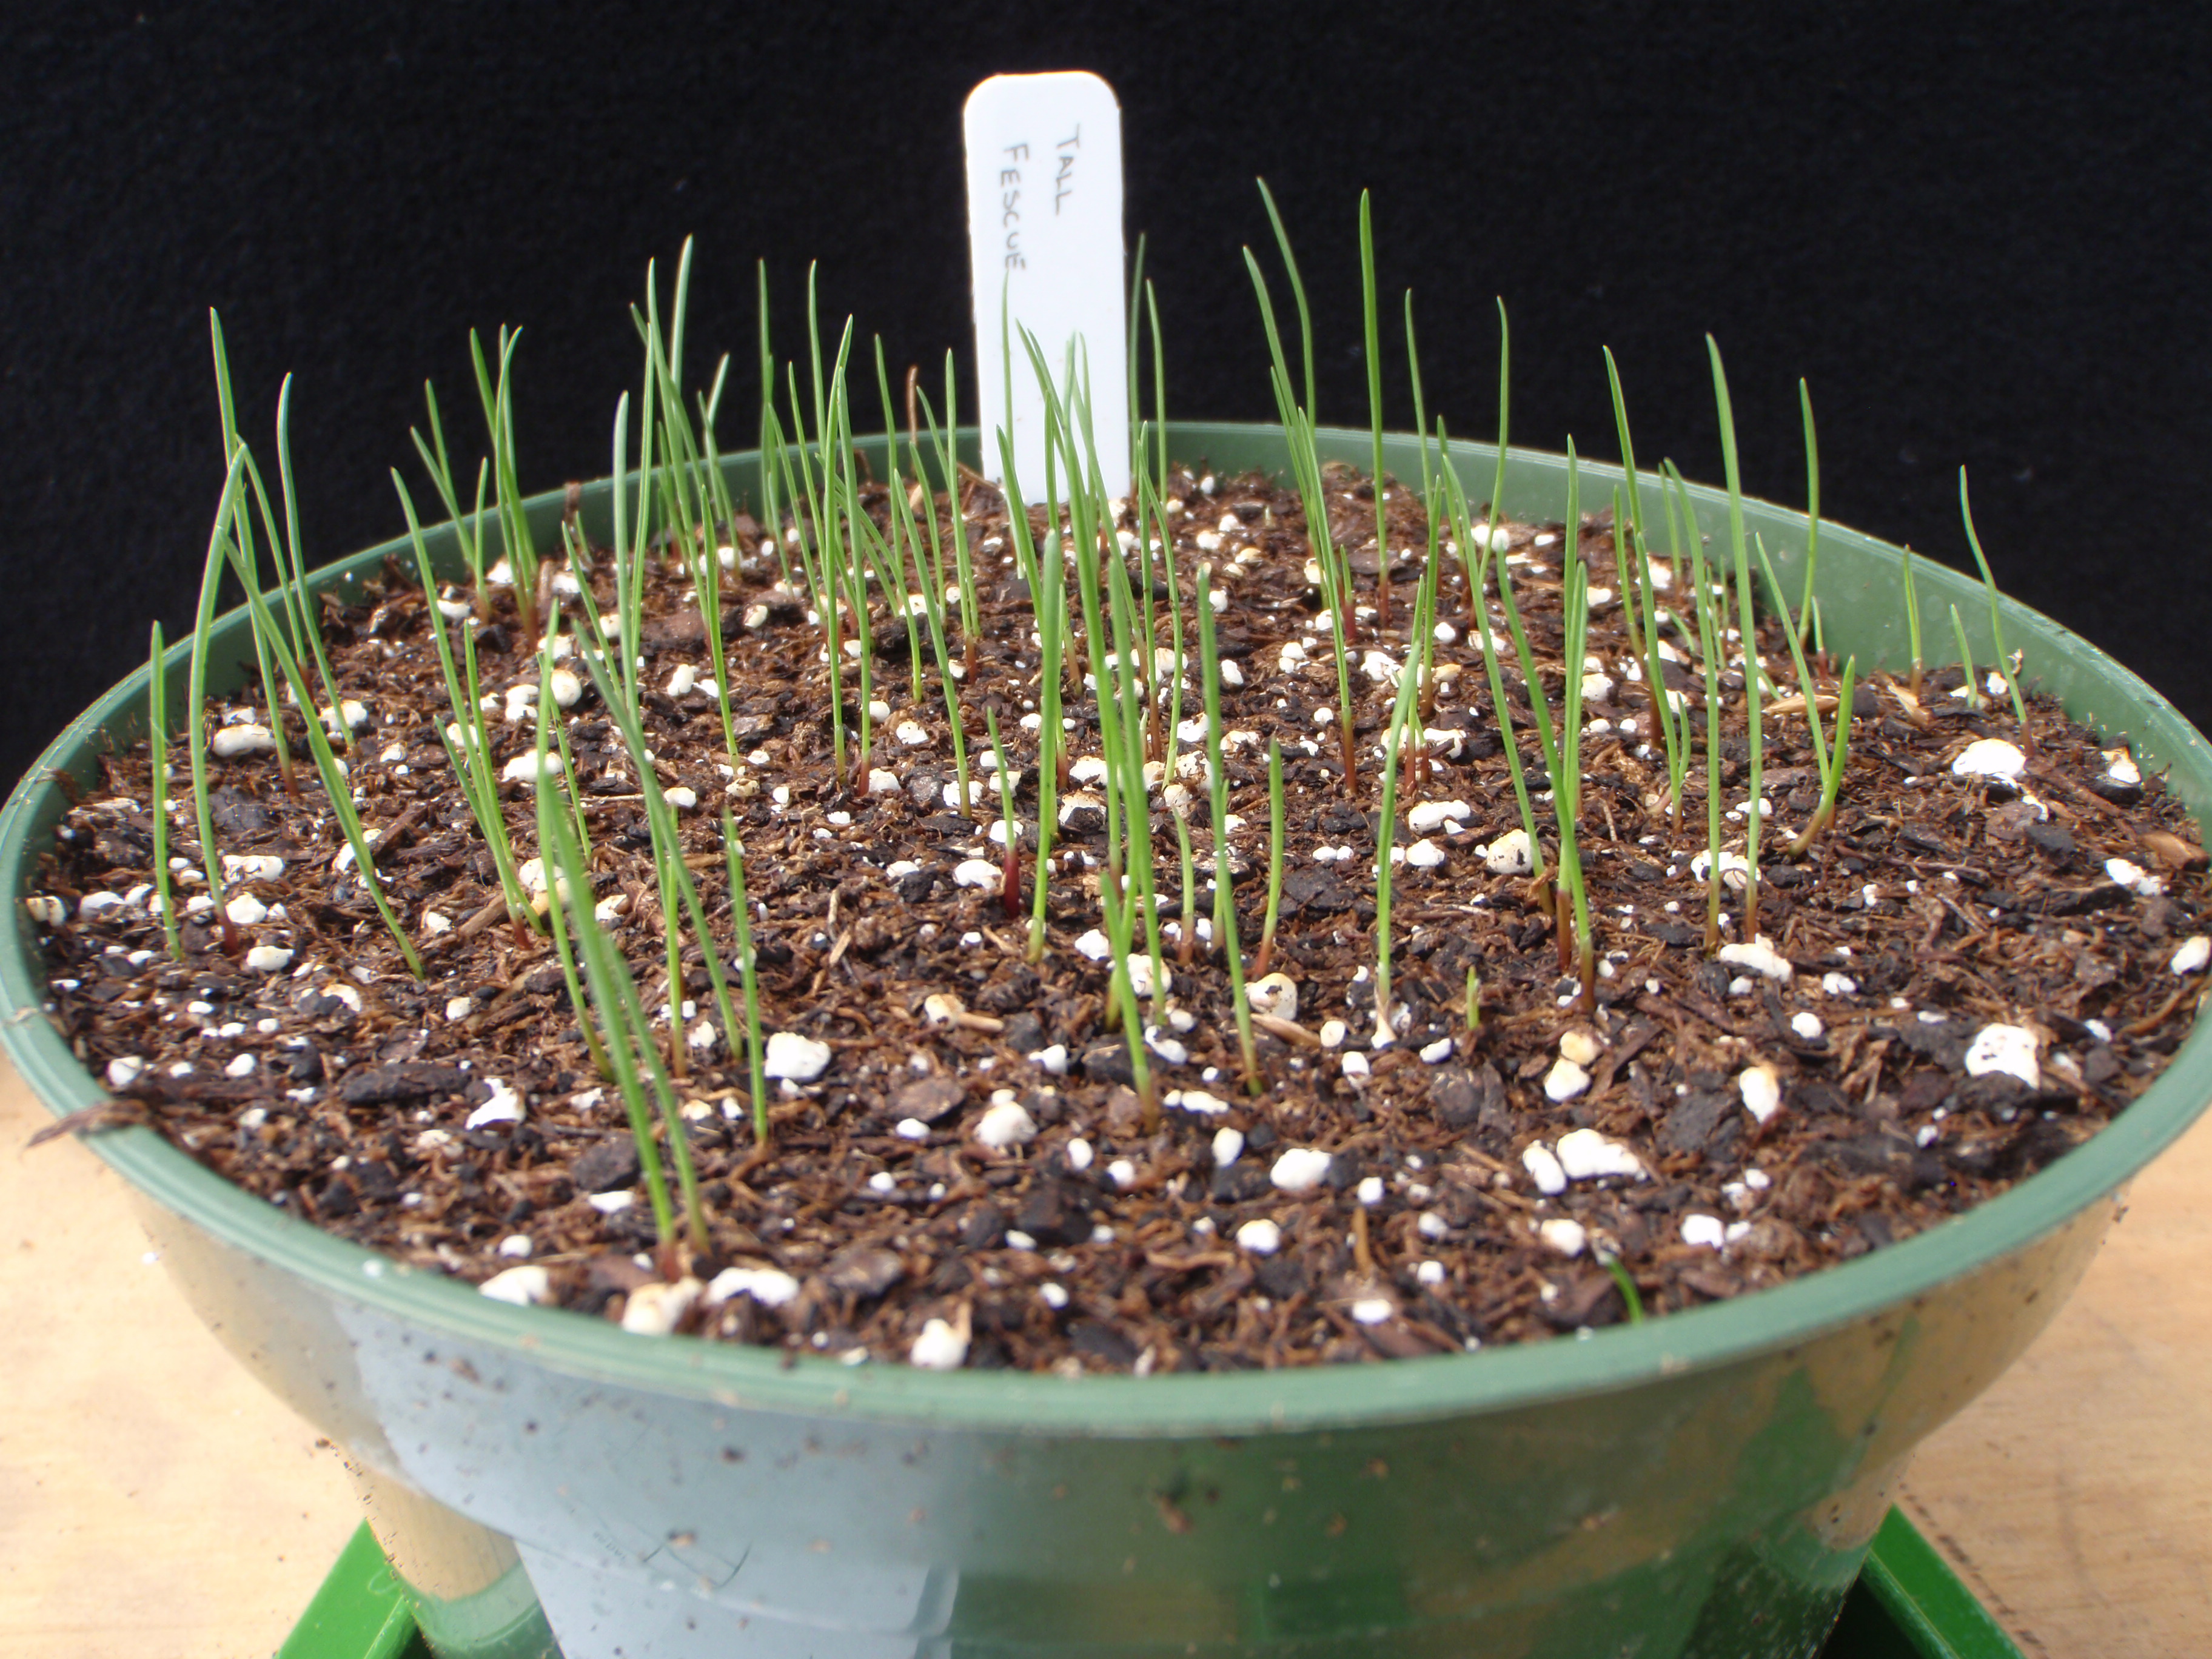
important part of new seed after care.
Even after the seed germinates, it will still be actively seeking water. And without a big giant root structure, it can’t look very far for water. I recommend watering at minimum every other day. This will help the soil surface dry a little to send the roots seeking, but still providing it enough to be able to find it.

Most issues I run into 3-6 weeks after seeding involve watering.

4. CONTROL WEEDS

So it’s six weeks after you’ve seeded. You’ve done your watering right, you’ve done your feeding right, and you have these weeds coming up every where! Unfortunately there’s not much you can do about preventing the weeds from coming up. When you disturb the soil surface, weeds come with it. So now there here – can I spray it? Will I kill my new seed?

If you’ve been able to mow your new seed twice, yes, you’re safe to spray it. Spraying is not something I would typically recommend to a homeowner. Trust a certified, licensed, & chartered company to take of that for you.

5. WINTERIZE

Whoever coined the term “winterizer” is a very rich individual. It’s become a household saying. What exactly does it mean? If you look in the above picture I highlighted the number 14. The 22 refers to the % Nitrogen in the bag. The 0, % Phosphorous in the bag. And the 14, % potassium in the bag. A winterizer fertilizer ideally has a high amount of potassium in the mix. Potassium is the second most utilized macro-nutrient by turfgrasses. Potassium strengthens the plant and root system to help it fight disease, traffic, and environmental stress.

As you can see, fall and winter months are a busy time for turfgrass professionals. There’s a lot that needs to take place to give the plant its best foot forward when facing next summer. These are the five easiest tips for what to do after you aerate and overseed that will guarantee a beautiful lawn.

Share this Post

Aeration and Overseeding in the Fall

Aeration and overseeding your lawn is the perfect way to quickly turn your lawn from neighborhood zero to hero.

Why Do We Aerate Lawns?

  • Aeration reduces soil compaction.
     Our soils are of lackluster quality.  Dense clay does not allow for water percolation easily.  Aeration pulls cores of soil out of the ground to allow for deeper water percolation.  This also allows for air to reach the root zone resulting in denser root clusters for each individual plant.


  • Aeration enhances seed germination.
    Because the seed lands in a deeper protected pocket where moisture can remain longer, seeds tend to germinate better in aeration plugs.


  •  Overseeding helps maintain turf density
    Environmental stress can lead to a decline in turf population and performance.  Areas that have succumbed to environmental stress need to be repaired.  Overseeding allows new turf to to fill in damaged areas resulting in dense and lush turf better suited to fight weeds.


  • Thick lawns fight weeds
    Not only is a dense lawn aesthetically pleasing, it actually serves a purpose from a turf management perspective.  Dense lawns create a stronger base to fight the germination of weed seeds.  This in turn allows for fewer herbicides to be used which in turn is more beneficial to our environment.


  • Aerating and overseeding quickly improves lawns appearance. 
    When most people think quick lawn, they think sod.  The beautiful thing about having a cool season turf is that sod isn’t always needed.  It certainly serves its purpose, but a lawn can be quickly and relatively inexpensively established from seed.  It provides a quick solution to what appears to be a lackluster lawn.


  • Aeration reduces thatch. 
    Thatch is made up of grass clippings and roots that do not break down very quickly.  It tends to mat which is a perfect breeding grown for a host of negative pathogens.  It often results in disease flare ups.

The Outdoor Designs Way

We aerate multiple directions to insure we’re providing adequate coverage.  The more plugs we can pull out of the ground, the more beneficial the impact to the soil.  After aerating, we then overseed.  We contact seed growers in the fall to have our custom blends put together for us.  We target turf type tall fescues that score highly in the NTEP trials in overall apperance and brown patch resistance.  At the time of overseeding, we also use our proprietary Organically Enhanced fertilizers to bring out the best in your lawn.

Contact us today to find out how to save 15% on your aeration and overseeding!  Oh, and refer and friend and earn an EXTRA 50$ off!

Share this Post

Five Easy Tips to Increase Curb Appeal

When it comes to selling your home, curb appeal is the name of the game.  The more appealing you can make your house from the road, the more likely you’ll attract visitors through your doors.  There are several little things that do not cost much and can be accomplished relatively quickly that offer wonders for curb appeal.  Follow these five easy tips to increase curb appeal and increase your property value!


Five Easy Tips to Increase Curb Appeal:

1. Beautifully Maintained Lawn

This may not always be the quickest step towards curb appeal, but it is rather easy.  There are a multitude of companies that offer varying degrees of service to help you achieve your budget’s look.  And depending on the time of year (fall here in Knoxville particularly), it can happen in as little as a month.  Having a professional spray weeds, aerate, overseed, and fertilize the turf can bring about rapid transformation.  Remember when choosing a company to look for license, charter, and discounts!  (We offer a 15% discount on aeration and overseeding early signups!)

2. Dressing up the Front Door

Adding a blast of color to the front door, or even replacing it with a new ornate wooden one can do wonders for the front of the house.  As you pull down the road you’ll notice the beautiful lawn.  As you make your way to the front of the house, a beautiful front door screams “Welcome!’  Perhaps red will offer a sharp contrast or the the warm notes of a natural mahogany will offer visitors with a sense of comfort and security.

3. Landscape Lighting

Landscape lighting has become one of my favorite accents over the last few years.  There’s not much you can see in a night time photograph of a house.  That being said, with the appropriate landscape lighting, the house can be seen in a whole new dimension.  Angles, depth, dimensions will stand out as never before and offer a view of your home far exceeding that of your neighbors.

3. Hardscapes

Hardscapes are one of our favorite projects at Outdoor Designs.  Very early into his career, Robert took to learning as much about preserving natural appearances while offer high aesthetic value utilizing stone.  Hardscapes offer a bit of color, but more character than anything.   Also, they serve a great function.  Hardscapes can be utilized as borders, walkways, or even driveways!  We recently completed a project where we pulled out a section of driveway and replaced it with permeable pavers.  The results were tremendous!

4. Outdoor Art

Outdoor art isn’t popular everywhere I’ve lived, but where I’ve seen it appropriately utilized, it’s been an invaluable feature.  Simple water fountains, metal cutouts, or even mossy rocks add spunk otherwise not available. Not only do fountains offer visual appeal, the soothing sounds are welcoming on a hot summer day.  When working with fountains, try to avoid placing them in range of leaves falling.

5. Add a New Planter Bed

Again, I typically recommend most homeowners to go with a respected, trusted landscaper when installing new beds.  The objective of a new bed is to add dimension, character, and visual appeal.  It is important when selecting the plants to go for colors with contrast compared to your home exterior.  Plants can be selected based on their seasonal color as well.  Depending on selection you can provide periods of blooms and beautiful colors year round.

As you can see there are several little things that can be done to improve curb appeal.  I asked my friend, commercial photographer Colby McLemore for tips on photographing your home when putting it on the market. He says, “When taking photos of your house make sure you photograph it immediately after sunset, right before sunrise or even a cloudy day. Most people photograph in the middle of a bright sunny day. This will give your pictures a beautiful soft look instead of nasty harsh shadows that ruin the beauty of any house and landscaping.”

Do you have tips of your own? Let us know in the comments below!

Share this Post

Lawn Insects and Pests

Yikes! It’s hot outside!

Sad news is, there are some critters out there that are having the time of their life – the dreaded lawn insects and pests of turfgrasses and ornamentals. So the questions are, what do I look for? What do they do? and what do I do about them?

You can easily find these lawn insects and pests if you were to check you or your neighbors lawn and landscape.

Turfgrass and Ornamental Pests

1. Japanese Beetles

Japanese Beetle 
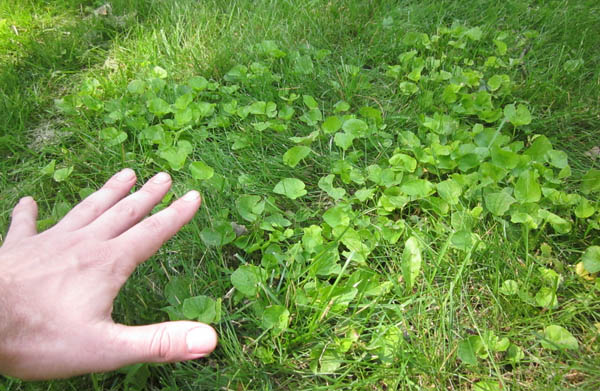
Japanese beetles start in the ground as larvae (also a turf destroying pest we’ll get to later.).  Once soil temperatures begin to rise, the pests emerge and landscape plant destruction machines.

Predicting their presence is a hard thing to do.  Their numbers can go up or down due to the effects of weather, diseases, parasites and predators. They’re very mobile, capable of flying up to five miles in search of food.

Unfortunately these pests have a vast palate as well, consuming over 300 different plant types.  That being said, though, they do NOT phlox, peony, iris and daylily.Japanese Beetle Damage

There damage is pretty easy to identify.  They skeletonize the leaves of plants, leaving only the veins behind.   While the immediate damage doesn’t kill the plant, what it does do is decrease the plants ability to produce its own food.  Photosynthesis begins with the leaf tissue taking in sunlight.  With the leaf tissue being removed by the beetle, photosynthesis cannot produce carbohydrates, thus starving the plant.  Bad beetles, Bad!

One of the most common mistakes I see people make when tackling Japanese Beetles is the use of bait traps.  Bait traps use pheromones to attract the bugs and then relies on them to make their way into the trap.  95% of the time what actually happens is that the beetles invade your property in massive numbers.  So how do you safely utilize traps? Put them in your neighbors yard! Or simply away from your own in the woods.

Of course you can always call a department of agriculture licensed applicator to take care of the issue.

2. Grub Worms

The grubs are beetle larvae.  They’re most abundant in the spring and fall where they survive and thrive by feeding on Grub Worm
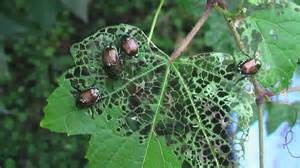
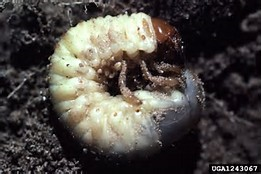
the roots of turfgrasses and even landscape plants (such as hostas).  Grubs are pretty easy to identify, as you can see in the picture.  They’re about an inch long and are easily found in most gardens.

Grub Damage
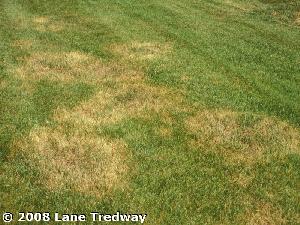
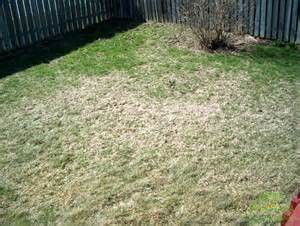
As previously stated, grubs feed primarily on grass roots.  They eat quickly and come in large numbers so it’s not uncommon to see them clear an entire lawn.   It is important to eliminate them as soon as possible otherwise it can be a lingering problem always resulting in underperforming turf – poor color, poor density.

You can use a host-specific product found at your local lawn and garden shop.    Milky Spore is a host-specific pesticide that will work well on any lawn.  It takes several years for it to build up in high numbers so it’s not an immediate fix to grub problems, but long term it can ward them off for many years.

3 . Army Worms

Army worms are a very common occurrence nowadays down south.  It seems every year once the latter part of summerArmy Worm 
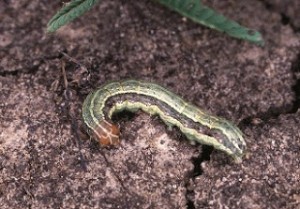
rolls around, so do the army worms.  They are hairless, striped caterpillars that feed on the foliage or turfgrasses and crops.  Called army worms for the way they travel in packs and invade in large numbers, they can do quite a bit of damage quickly.

Army worms travel as moths.  Evidence of moths can be seen early mornings and late afternoons and are usually attracted to light.  There egg sacs can be spotted on brightly colored surfaces ranging from golf flags to home siding.  They emerge from the sacs as small green caterpillars but mature into 1.5″ caterpillars ranging from olive green to dark gray.

They don’t do well at over wintering so they usually migrate from further south. Army worms have many natural predators so there numbers vary greatly year to year.  Often times there presence can be spotted because of the number of birds seen in a lawn pecking at them.  Wasps tend to find them appetizing as well.

There’s not much that can be done culturally to manage an army worm infestation.  It can be handled a couple of different ways: 1. do nothing.  Army worms eat the foliage of the plant which doesn’t necessarily kill turfgrass.  It can certainly stress it – no foliage means very little photosynthesis is taking place, but it doesn’t cause “permanent damage.” 2. Insect controls can be applied at relatively low rates to achieve an acceptable level of control.  Once applied, with a little fertilizer, the turf can rebound back to its performance state.

These are the three most common pests we see here in Knoxville.  What pests have you come across?  How do you handle them?

We’d love to know!

Share this Post

The Heat is On: Summer Lawn Care Nightmare

It’s not only a Glenn Frey song, but also our living breathing reality! I know everyone enjoys, as much as I do, sweating instantaneously. Unfortunately though, I’m here to talk about summer lawn care. So grab a big bottle of water, crank up the AC, and come along for the ride (free ride)!

Summer Lawn Care

So whats happening to the lawn right now? Well, a whole lot for summer lawn care professionals. So we had a ton of rain come through the area, a few days of cooler temperatures, and the lawns really jumped back to life. Good right? Yes and no. The rain perked up leaf production which increases photosynthesis and in turn carbohydrate storage. Crabohydrates are essential for giving the plant a bank of resources in times of stress. So +2 rain in the summer lawn care game!

The rain also increases humidity. Humidity, warm temperatures, wet lawns = disease pressure. -1 in the summer lawn care game. Fortunately we have all this carbohydrate storage going on so in the event disease does break out, we can correct it with fungicide and the stressed foliage can recover.

Water, what a love hate relationship.

Insect activity tends to thrive in the warm weather. It’s a little early for turf destroying grub worms, but mites, adult japanese beetles, and june bugs are out in full force. Heat also means it’s also time to check your evergreen conifers for bag worms! Over the last 3 weeks, I’ve seen the a sharp increase insect activity. I’ll score this a zero in the summer lawn care game.

One thing that does not need to happen with your fescue right now is nitrogen. Nitrogen is the utilized most by tge plant, but this time of year, nitrogen is like gasoline to fescue. It can make a rather minor issue turn into a full fledged nightmare. What a nightmare! No nitrogen? +1 summer lawn care!

Truth be told, once temps reach 90, fescur begins going dormant. No amount of water, shade, or prayer can stop it from happening. It’s good to maintain your proper cultural practices to avoid losing the turf, but I wouldnt exactly get my hopes up on it looking like a million dollar lawn. That being said, we’re getting awfully to the beautiful time that is aeration and overseeding! It turns out summer lawn care is not a game, its managing the extremes of nature to the best of your ability – ah ha!

Stay cool and stay hydrated!

Brown Patch Disease

5 Ways to Manage Brown Patch

Brown Patch

Brown Patch Disease

Brown Patch Disease

disease, Rhizoctonia solani, is one of the most destructive diseases in our area.  It is characterized by having a smokey ring with a brown patch of turf in the center.

It favors hot, humid weather.

brown patch smoke ring

Brown Patch

You can see brown patch most active in temperatures falling between 70 – 90 degrees and when the turfgrass remains wet for 8-10 hours.  Depending on your turf type, this can be very easily achieved, even in times of drought, due to dew and tall turf types. Poor soil drainage, lack of air movement, shade, cloudy weather, dew, over-watering, and watering in late afternoon favor prolonged leaf wetness and increased disease severity. Brown patch is particularly severe in turf that has been fertilized with excessive nitrogen. Inadequate levels of phosphorus and potassium also contribute to injury from this disease.

All this may be bad news – but are there things we can do to help? Of course!


1. Choosing the Right Turf Type

Not all fescue seed is the same.  It shouldn’t be selected that way.

If you’ve ever looked at seed varieties in your local big box store, you’ll see screaming labels touting drought resistance, disease resistance, and never have to water.

This all sounds great, but it’s NTEP accurate.  NTEP is the National Turfgrass Evaluation Program.  They evaluate different turf types under several different parameters to provide a database for us to utilize.

Turf Type Tall Fescue varieties showing the most brown patch resistance according to NTEP, would be Falcon V, Faith, Catalyst, Bullseye, and Falcon IV.


2. Cultural Practices

Cultural practices also have a profound effect on brown patch development. Nitrogen fertilization, irrigation, and mowing are the most important factors. Tall fescue should be mown high, between 2.5 and 3.5 inches. Mowing heights below 2.5″ increase disease development by reducing the plant’s ability to produce energy, whereas mowing heights higher than 3.5″ create a turf canopy that is dense, matted, and holds moisture for extended periods. Again, back to our causes,  grass blades wet for 8-10 hours lead to disease development.

3. Irrigation

Irrigation plays an important role. Irrigation should not be applied just before sunset or just after sunrise – this will extend the duration of leaf wetness and encourage disease development. Irrigation should be applied between midnight and 6 AM to minimize day time leaf wetness. Also, irrigation should not be applied every day. Instead, irrigation should be applied “deep and infrequent”, with sufficient water to wet the entire root zone every 3 to 4 days.  So you’re better to water twice a week at 45 minutes/zone, rather than 7 days a week at 10 minutes/zone.

4. Fertilization

Too much nitrogen causes a more favorable environment for brown patch severity. Nitrogen causes tall fescue to produce soft, lush leaves that are easily infected by the brown patch pathogen. Excessive leaf growth also results in a more dense canopy that holds moisture and humidity. It is important to note that nitrogen does not cause brown patch to develop, rather it makes the disease more severe. Many landscape managers are unfairly accused of causing brown patch to occur by fertilizing too much.

5. Fungicides

Even if all the appropriate steps are taken to avoid brown patch, it still may strike.  We are dealing with nature, after all.  So how do you manage it?

It’s best to call a professional to analyze, diagnose, and plan an appropriate course of action.  Depending on the severity of the disease, fungicides may not be feasible in achieving an acceptable level of control.  Sometimes environmental conditions may be so extreme that fungicides will not provide an improvement in turf quality.

Here in Knoxville, we see brown patch all too often.  If you think you may have disease affecting your lawn, give us a call and let one of our trained professionals determine the correct course of action for your lawn!

Trees and Shrubs | Outdoor Designs

Our Tree and Shrub Program for Knoxville covers 6 rounds of service.  We utilize horticultural oil sprays, root zone fertilizer and micronutrient drenches, a comprehensive  insect and disease control prorams, and a fall root zone drench fertilization.

Trees and Shrubs – Horticultural Oil

This treatment smothers insects and insect eggs.  It is a natural product that minimizes environmental impact while still keeping insect populations in check.

Knoxville trees and shrubs

Trees and Shrubs – Spring Fertilization

Your plant material will be fertilized with a full, balanced fertilizer. The material we found most effective is a highly specialized product designed to deliver maximum aesthetics. The formulation contains a balance of 11-8-5 NPK plus boron, iron, manganese, copper, zinc, cobalt and molybdenum. The minor elements are EDTA chelated, which enhances their effectiveness.  This product will send your trees and shrubs into a state of thrival not merely survival.

Trees and Shrubs – Insect and Disease Control

Late spring and early summer is the time to control insects and disease before they do damage.  Bagworms, aphids, and mites are in the early stages of growth and may not be visible at this time.

knoxville trees and shrubs

Maple Bladder Gall caused by mites

All types of insect activity occurs in summer months.  The timing and materials utilized in our program are designed to give you the maximum impact for controlling damaging insect populations.

The later months of summer may bring disease problems depending upon the heat level.

knoxville trees and shrubs

Bagworms on a Leyland

We utilize an ever changing rotation of contact and systemic materials to stay ahead of issues.

Trees and Shrubs – Fall & Winter Root Drench Fertilization

Fall is often underrated when it comes to plants and fertility.  In fact, fall feedings, whether it be turf or trees and shrubs, has a greater overall impact than fertility applications in spring!

Whatever the case may be, it’s important to have a professional inspect your trees and shrubs before they’re ever sprayed.  Here at Outdoor Designs, Matt Martin is certified and licensed in horticulture, lawn, and turf applications.  He’d love to look at your lawn or trees and shrubs and formulate a specific, custom program for you!

Contact us today.

Share this Post

Mowing Grass Makes A Difference

HOW YOU MOW GRASS CAN MAKE A BIG DIFFERENCE IN YOUR LAWN’S QUALITY

Lawn mowing sounds like a simple enough thing. You just gas up the mower, yank the cord, walk or ride around in rectangles for awhile, and the deed is done. Ah, but the lawn connoisseur knows there’s a lot more to it than that. How you mow, when you mow and even what you do with the clippings can make a big difference in how your lawn performs. In fact, mowing the lawn is probably the most underrated and overlooked part of good lawn care.

It starts with grass height

The biggest mowing miscue the typical homeowner makes is cutting grass too short. Some people downright scalp the lawn, using the putting-green look as the ideal model. That’s a bad idea culturally for several reasons:

  • It increases moisture and nutrition demands as the grass tries to fight back from near total decapitation.
  • It reduces the amount of chlorophyll available to manufacture energy to fuel the grass roots. (Longer blades mean more chlorophyll per grass plant and consequently more vigorous grass.)
  • It allows the soil to dry out faster, which increases the ill effects of drought.
  • And, weeds germinate better and get off to a faster start when taller grass blades aren’t shading them out.

What really makes a mown lawn look good is the evenness of the cut — not its height. Most people are just as happy with a 3-inch-tall evenly cut lawn as a 1-inch-tall evenly cut lawn.

A bad cut can dehydrate your lawn and promote weed growth.

The theory that cutting short lengthens the time between cuts also doesn’t hold up. Grass actually grows faster after it’s been cut short as it tries to rebuild itself to its genetic norm.

A good in-season height for most turfgrasses is 2½ to 4 inches — typically the highest setting on mowers.

Don’t wait too long between grass cuts

A second important issue is when to get out the mower. A good rule of thumb is to mow the lawn often enough so you’re never removing more than one-third of the blade length at a time.

Mowing is actually pruning. And that’s a form of injury to the grass plants. Severe cutbacks are much more stressful on grass than lighter cuts and require more energy to heal.

When grass is growing fastest in mid-spring, this may mean mowing twice a week or every four or five days. It’s much better to cut that often than to wait a few more days and end up having to whack 3 inches off of a 6-inch stand. That’s not only a shock to the grass but creates an unusually large mass of clippings.

And what about the grass clippings?

Big piles of clippings are bad news because they can’t be left on the lawn. They’ll mat down the living grass blades and shut off the sun’s rays, which will yellow the grass and encourage diseases. Clippings that can be seen even in small piles should be raked up and preferably composted or used as a mulch over garden beds.

Clippings can potentially provide one-third of your lawn’s nitrogen needs to don’t rid them EVERY time.

If you’re mowing regularly, clippings won’t be a problem. They’ll be short enough to disappear into the lawn. It’s actually best to let the clippings drop into the lawn as opposed to bagging them. Why?

  • They return precious nutrients to the lawn soil as they break down. Turfgrass researchers at Penn State University estimate that letting the clippings decay in place supply about one-third of the lawn’s total nitrogen needs for the season.
  • The decaying clippings add organic matter to the soil.
  • Clippings are not a significant cause of thatch in the lawn, as is often believed. Thatch is that layer of dead roots, crowns and other decomposing matter that can impede rainfall and oxygen exchange when it’s too thick (i.e. more than an inch). In a healthy lawn, microbes quickly break down small grass clippings.
  • Returning the clippings to the ground is recycling at its best and keeps organic “waste” out of the trash stream.

Mulching mowers do an excellent job of chopping the clippings into small pieces. Even ordinary side-discharge mowers disperse clippings well enough to let them lie when you mow at frequent enough intervals.

mowed lawn

If you fall behind, at least try to work around the perimeter of the yard, shooting the clips inward so you’ll end up having to rake only one or two channels in the middle. If you go back and forth — shooting first to the right and then to the left — you’ll end up with a channel of clippings every two passes.

Avoid cutting the grass when it’s wet. The clippings are more likely to mat together then, you won’t get an even cut (the mower wheels will flatten grass blades), and you may even compact the soil if it’s wet.

Also don’t attempt to mow when grass is going brown and dormant in a drought – even if you’re mainly doing it because weeds are continuing to grow and are poking up. Grass crowns become brittle and fragile in drought conditions, and if you smash them with your feet and mower wheels, the plants won’t recover when rains return. Dead crowns equal dead grass.

OF LAWN MOWER BLADES AND MODELS…

Reel mowers, though not always a viable option, are the preferred mower.  These work great, but so do rotary mowers when they’re kept in good condition.

No matter which style of mower you’re using, the most important thing you can do is keep the blades sharp. Nice, sharp lawn mower blades make a clean cut. Dull blades rip the heads off grass blades and cause ragged edges.

First, that’s a cosmetic problem because rough, ragged cuts make bigger openings that turn brown and stand out more than sharp cuts. But even worse, those bigger openings cause the grass to lose more moisture, which increases drought stress in hot weather. And bigger openings leave grass blades more vulnerable to disease spores.

Sharpening your lawn mower blades once every few years is not enough. Two or three times during the growing season is a better game plan, and even sharpening once a week is the preferred schedule. Some homeowners I know own two different lawn mower blades so they always have one for the mower while the other is being sharpened.

Habits and mowing patterns

Finally, there’s the issue of the course you take as you mow. Many homeowners take the exact same route every time because it makes sense to them for one reason or another (convenience, habit, avoiding the nosy neighbor, etc.) There’s no extreme horticultural problem with that (unless ruts start forming), but altering the route can make a cosmetic difference.

Look closely and you’ll notice that the color of the grass appears different depending on which way you passed over it with the mower. That’s because the force of the spinning mower blades blows the grass blades as it cuts them. Light reflecting off the grass will make it look lighter or darker, depending on which way the blades are laying.

It’s this pattern of mowing that accounts for the designs commonly seen in athletic fields. Some really avid home-lawn fans do the same thing themselves, and there are even special mower blades designed for creating patterns.

Varying your route can make a slight difference in the evenness of the cut by making sure no particular areas keep getting pushed down while others are always cut off.

Lawn mowing might not be rocket science, but it isn’t exactly foolproof either. Just remember these few key rules, and you’ll be master of your mower: Mow high and often. Let those clips lie. And keep those lawn mower blades sharp!

Share this Post

When Do I Aerate My Lawn

When do I Aerate My Lawn?

Soil compaction in Knoxville is a primary cause of an unhealthy lawn. Aerating can help relieve soil compaction, and spring is an excellent time to do it.

Aerating your lawn achieves several things:

  • It reduces compaction from regular mowing and traffic such as lawn games.
  • It opens up space to allow air to get to the roots.
  • Less compacted soil drains better.
  • Grass plants are better able to utilize water and nutrients.
  • Regular aeration also reduces buildup of thatch—a layer of dead roots, leaves and stems. Up to a half-inch of thatch is good because it provides a cushion and some protection to the roots. However, heavier thatch buildup reduces water and nutrient absorption and can smother the roots.

Soil compaction is a common cause of a struggling lawn. If your grass receives heavy traffic, it will best survive that use if aerated once or twice a year. A heavy clay soil also needs more frequent aerating. Lawns receiving light traffic or established on a sandy soil can be aerated once a year or every other year.

If you live in the south and have warm season grass such as Bermuda and Zoysia, it’s an excellent time to aerate. These grasses are most actively growing in the late spring and early summer.

Cool-season grasses such as bluegrass, ryegrass and fescues (Most common in Knoxville) grow most actively in the fall and spring, and aerification is best done then. However, if soil is especially compacted, early aerating in summer is fine. Furthermore, if your lawn has thinned out due to winter damage or disease, aerating before seeding and fertilizing will help your lawn thicken up more quickly.

aerationCore aerating — using a machine that removes plugs of soil — is the easiest way to aerate. Hand aerators are available, but in most cases, a machine is much easier and will do a better job. These aerators can be rented at some garden centers and most rental stores but are very tough to maneuver.

The soil should be moist but not wet when you aerate. A sandy soil should be watered lightly the day before aeration. A heavy clay soil should be watered about two days before. To ensure complete aerification, it is best to go across the lawn twice: once east to west, and once north to south.

The “cores,” or plugs, left behind by the aerator can be removed, but don’t need to be. In a couple of weeks, they will break up with weather and traffic. If you want to speed up the process, drag a mat across the lawn to break up the cores. Unless you are going to remove the cores, it is best to do your aerating a couple of weeks before a family get-together or planning yard games.

Planning on aerating your lawn?  In Knoxville Aeration is very important when needed. Contact us for a quick meeting to weigh pros and cons as to how aerification will impact YOUR lawn.


Share this Post

How Long Should I Water My Yard

Oh how the weather has shifted indeed!

Our once vibrant green fescue lawns growing 2″ per week have wilted and dried up.  Our once cool nights and mild days have turned into near scorchers and zero rain to boot!

What do we do?!

1) Say a prayer.  (Haha, it’s a good thing to practice)

2) Irrigate

But how do I irrigate?
irrigation 
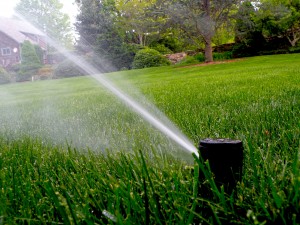
I get asked often “how long should I run my irrigation system?” or “how long should I water my yard?”  And the answer I have to give is, “it depends.”  You see, water pressure can vary from neighborhood to neighborhood.  Water pressure, nozzle selection, and even the types of heads can all influence how irrigation systems perform.  The real magic in an irrigation system is measuring exactly how much output you’re getting.

How do you measure irrigation output?

It’s easy I tell you!  I recommend using empty tuna cans, pie pans, or even cat food cans and placing them somewhere in the lawn.  Turn on the irrigation zone that covers the area with the tuna can.  Time exactly how long it takes to fill up that tuna can.  Voila!  That time it takes to fill up the tuna can is how long you should run your irrigation system.

Effectively what we’re looking for is 1″ of water per week.  Infrenquent, deep waterings promote deeper root development.  The deeper the roots run, the better the defense against environmental stressers, thus resulting in more aesthetic surface growth.

What about when it gets scorching hot outside?

Come July and August, when the temps are near 100, and there is no rain in the forecast, it may then be necessary to increase water to 2″ per week.  How do you do that?  Run your 1″ water cycle on 2 different days.  So if you typically water on Monday, maybe add Thursday.

Proper watering is an integral part in plant survival.  Do your part to help the plants survive!

Share this Post